Someone made a robot that searches for a "beatable object". When the robot finds this object, it lays down a funky groove ... and I think it's brilliant.
Friday, July 24, 2009
Monday, July 13, 2009
Qt - Arduino Serial Communication
If you want to make a Qt application capable of serial communication with an Arduino, then these are some great resources to do so:
* QextSerialPort : cross-platform serial port library
* Arduino Serial reference : awesome Arduino documentation
Notes:
I had some trouble getting the QextSerialPort library to work with VS 2008, so I will just go over all steps I needed to take.
* Run this command in the QextSerialPort directory: qmake -tp vc : this will make a .vcproj file from the .pro file
* Open the .vcproj file with VS 2008
* Change the configuration type from dynamic library to static library [as the original setting did not produce a .lib file]
.. and you are ready to go.
JR
Saturday, July 4, 2009
Qt - Ogre - VS2008 Express
This post describes the steps necessary for getting Qt, Ogre and Visual Studio 2008 Express to work, as well as the code for a very basic OgreWidget.
Compile Qt with VS 2008 Express
Set up Ogre
A Qt/Ogre project in VS 2008 Express
You will need a few .pro files setting up your Qt/Ogre project.
It can all be placed into one file, but it might be convenient to split it into several files for easier reuse.
Settings.pro : Change your ogre home directory
For each project a separate project file.
MyProject.pro : the sources and headers need to be edited, obviously
This is a basic config to configure a Qt/Ogre application.
This project file assumes the Settings.pro file is one directory up.
Read more about Qmake project files: here
Now we set up the actual Visual Studio project:
File->New Project->Visual C++ ->General->Makefile Project
Go to the project properties (for All Configurations):
Configuration Properties -> NMake -> General
This will tell your Visual Studio to use qmake, which will convert the .pro files to a makefile for nmake, and to compile this file with nmake.
Qt/Ogre IntelliSense setup
Go to the project properties (for All Configurations):
Configuration Properties -> NMake -> IntelliSense
An OgreWidget implementation
I've tried to create a very basic OgreWidget which subclasses a QWidget. Most of the code was taken from a couple of the sources below, taking only the parts which are strictly necessary and leaving out all redundant code. The widget only renders the Ogre scene, it does not handle any user input.
OgreWidget.h
OgreWidget.cpp
Here is a code snippet on how to use this OgreWidget:
In a QMainWindow:
Easy, isn't it?
Now you set up the Ogre scene:
Of course your Ogre code will become much more ellaborate, but this is the minimum you need to render an Ogre scene inside a Qt Window.
I hope this is useful to someone :)
JR
Sources
Qt and VS 1
Qt and VS 2
Qt and VS 3
Qt and Ogre 1
Qt and Ogre 2
Qt and Ogre 3
IntelliSense
Compile Qt with VS 2008 Express
- Download and install Visual Studio Visual C++ 2008 Express Edition
- Download the source code of the Qt libraries
- Extract the zip to a path without spaces: e.g. C:\Qt
- Open the Visual Studio prompt: programs->visual studio 2008-> vs 2008 tools-> vs 2008 command prompt
- Go to the Qt dir
- Type: configure
- Type: nmake [this may take several hours]
- Setup path and VS 2008 directories
- Add an environment variable: QTDIR=C:\Qt
- Add to the path: %QTDIR%\bin
- Check if the previous is done right by opening a command prompt and typing: qmake [if this shows the help of this command, it is ok]
- Add $(QTDIR)\include to the VS 2008 VC++ include directories
- Add $(QTDIR)\lib to the VS 2008 VC++ library directories
Set up Ogre
- Download and install Ogre SDK for Visual C++ 2008
- Add OGRE_HOME to the environment variables: e.g. OGRE_HOME=C:\OgreSDK
A Qt/Ogre project in VS 2008 Express
You will need a few .pro files setting up your Qt/Ogre project.
It can all be placed into one file, but it might be convenient to split it into several files for easier reuse.
Settings.pro : Change your ogre home directory
win32 {
    # You may need to change this include directory
    OGREHOME = C:\OgreSDK
    Release:LIBS += -L$$OGREHOME\bin\release
    Debug:LIBS += -L$$OGREHOME\bin\debug
    LIBS += -L$$OGREHOME\lib
    INCLUDEPATH += $$OGREHOME\include
}
For each project a separate project file.
MyProject.pro : the sources and headers need to be edited, obviously
exists(../settings.pro):include(../settings.pro)
else:message("I can't find settings file")

CONFIG(debug, debug|release) {
  LIBS *= -lOgreMain_d
}

CONFIG(release, debug|release) {
  LIBS *= -lOgreMain
}

TEMPLATE += app
CONFIG += qt warn_on
SOURCES += Main.cpp OgreWidget.cpp
HEADERS += Main.h MainUI.h OgreWidget.h
TARGET = Main

win32:debug:CONFIG += console
This is a basic config to configure a Qt/Ogre application.
This project file assumes the Settings.pro file is one directory up.
Read more about Qmake project files: here
Now we set up the actual Visual Studio project:
File->New Project->Visual C++ ->General->Makefile Project
Go to the project properties (for All Configurations):
Configuration Properties -> NMake -> General
| Build Command Line: | qmake && nmake $(ConfigurationName) |
| Rebuild Command Line: | qmake && nmake $(ConfigurationName)-clean && nmake $(ConfigurationName) |
| Clean Command Line: | nmake $(ConfigurationName)-clean |
| Output: | $(ConfigurationName)/Main.exe |
This will tell your Visual Studio to use qmake, which will convert the .pro files to a makefile for nmake, and to compile this file with nmake.
Qt/Ogre IntelliSense setup
Go to the project properties (for All Configurations):
Configuration Properties -> NMake -> IntelliSense
| Common Language Runtime Support | Common Language Runtime Support (/clr) |
| Include search path | "$(QTDIR)\include";"$(OGRE_HOME)\include" |
An OgreWidget implementation
I've tried to create a very basic OgreWidget which subclasses a QWidget. Most of the code was taken from a couple of the sources below, taking only the parts which are strictly necessary and leaving out all redundant code. The widget only renders the Ogre scene, it does not handle any user input.
OgreWidget.h
OgreWidget.cpp
Here is a code snippet on how to use this OgreWidget:
In a QMainWindow:
m_pWidget = new QtOgre::OgreWidget(this);
//Add the widget to the QMainWindow
setCentralWidget(m_pWidget);
//uncomment code below for fullscreen
//Hide all the GUI stuff you do not want to see fullscreen
/*menuBar()->hide();
statusBar()->hide();
showFullScreen();*/
Easy, isn't it?
Now you set up the Ogre scene:
  //Create the scene manager
  mSceneManager = Ogre::Root::getSingleton().createSceneManager(Ogre::ST_GENERIC, "GenericSceneManager");
  //Create the camera
  mCamera = mSceneManager->createCamera("Cam");
  //Add a viewport to the render window from the OgreWidget
  m_pWidget->renderWindow()->addViewport(mCamera);
Of course your Ogre code will become much more ellaborate, but this is the minimum you need to render an Ogre scene inside a Qt Window.
I hope this is useful to someone :)
JR
Sources
Qt and VS 1
Qt and VS 2
Qt and VS 3
Qt and Ogre 1
Qt and Ogre 2
Qt and Ogre 3
IntelliSense
Thursday, July 2, 2009
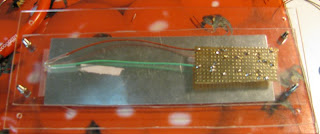
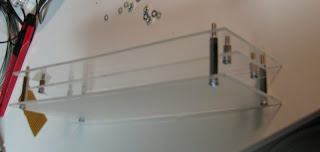
Plexiglass Skybluepink Frame
I made this as another gift to a friend of mine, namely the drummer in my band (Skybluepink). It is a frame with the name of the band and two blinking leds behind it. It has an on/off switch and it runs on a 9V battery. Yes, it's not very high tech.
Score and Snap-method
One of the difficult parts in creating this, was transforming a broken piece of plexiglass I found somewhere, into the shapes I needed for this object. As it turns out, using an ironsaw is a very bad idea. The best results I got, was by scoring it with a cutterknife a couple of times and then snapping it along the groove made by the knife, hoping that it did not snap in the wrong places :)
Spray-painting
The other difficult part was the painting of the plexiglass. My buddy JD created a drawing which I cut out from a transparency sheet. I placed this shape over the plexiglass and then I spray-painted it. The problem was that a bit of the paint went under the cut-out shape, causing a lot of work the manually remove the excess paint. The best way to prevent this, is to make sure that the shape will not bend and is completely taped to the surface you are spray-painting.
The video
Some pictures


Subscribe to:
Posts (Atom)